Showing posts with label cupcake. Show all posts

Wednesday, October 19, 2011

Epic Cupcake...Cake.


Soooooo my flight is finally booked for me to head back to Belgium next month. Thing is, I'll be landing a day before my sons birthday. Every year, I make him his favorite dinner as well as a cake. Before I flew back to the states, I asked him if he was wanting fried chicken, mashed potatoes (with gravy) and Brussels sprouts for his birthday dinner as well as an Oreo cake...of course, he said "YES!". Do I know my kid or what? 

I tend to stick with a bunt pan when it comes to making "filled" cakes, but I've been eye balling a nifty little baking pan that makes your cake in the shape of a massive cupcake. Yes, a massive cupcake. Every kids dream, right? Well, THIS kids dream. Anyway, I popped into Bed, Bath and Beyond and managed to find one of the pans...I was pretty torn...do I want it in silicone, or metal? I ended up getting it in the metal pan since I read customer reviews on Amazon (yes, I researched) and a lot of the customers said that the silicone pan made your house smell like burning rubber. Not exactly the first smell that comes to mind when I wanna smell cake. 

Like I said, I'll be landing the day before Johns birthday, so I wanted to do a test run with this spiffy cake pan since I didn't wanna put my eggs in one basket with hoping this thing would work...then it turns out to be a massive flop. 


I figured since it's near Halloween, I'd go ahead and use some holiday themed Oreo's to help get the cupcake feel "seasonal" even though it was just gonna be a test run.


For reference, if anyone happens to buy one of these after reading my blog...you'll need to set the oven at 325& since this takes, roughly, a little over an hour to bake because of how deep the bottom of the muffin is. Even though the box for this pan says it's non-stick, definitely layer a good amount of Pam (I used the baking one) on the BOTTOM part first..don't mess with the top part yet. To make the batter, you'll need TWO boxes of cake mixture..you WILL have left over batter, but it's enough to make a few extra regular sized cupcakes if you want. 


As you can see, I poured in my batter into the bottom portion of the cupcake and left about an inch from the rim. Pop this in the oven for about 10-12 minutes, spray the Pam on the cupcake top pan, pour in batter and bake for an additional 50-60 minutes. 


Once it's done baking, have it COMPLETELY cool off before you attempt to get it out of the pan. If you try to do this while it's remotely warm, it'll fall apart. 


Level off the bottom of the top piece and vice verse with the bottom so they'll sit evenly on one another. 


I ended up having some fun and made a super bright green sour cream / butter cream frosting..I didn't know that you could get neon food coloring! 


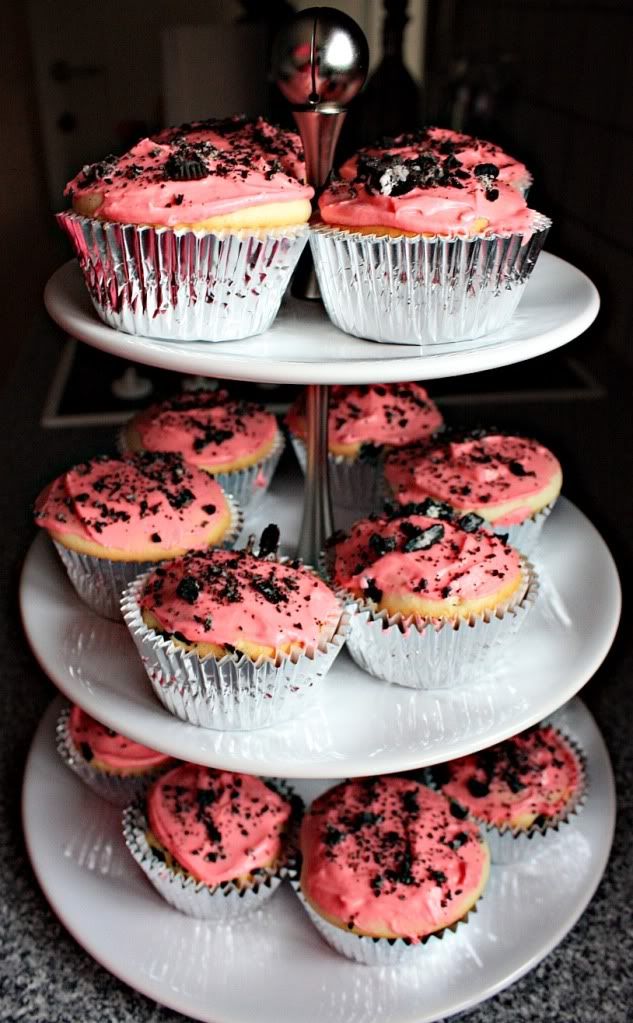
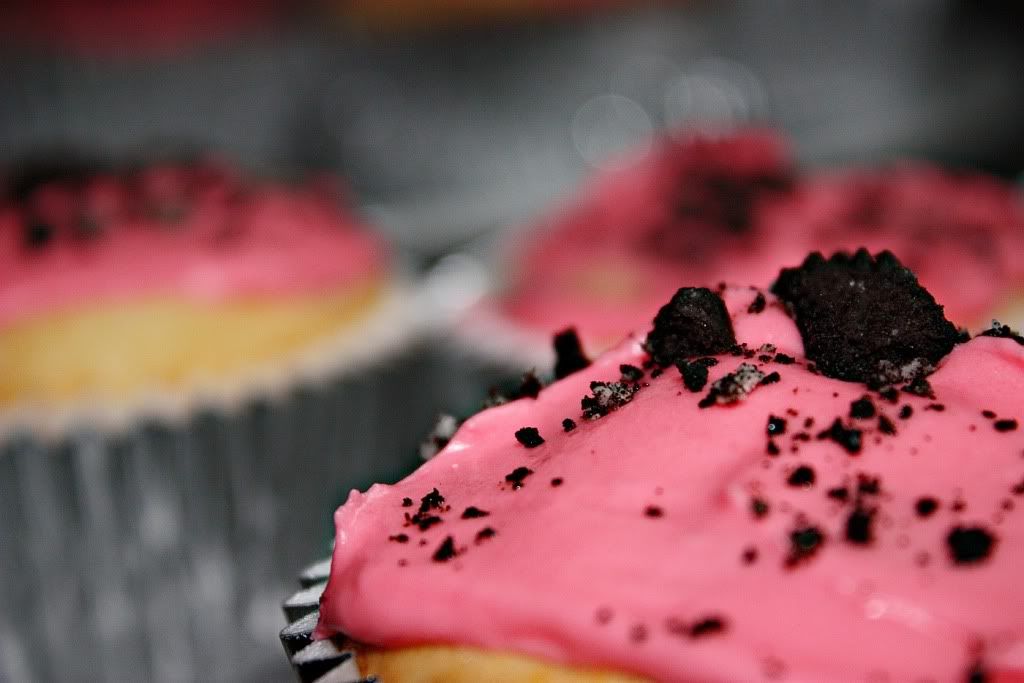
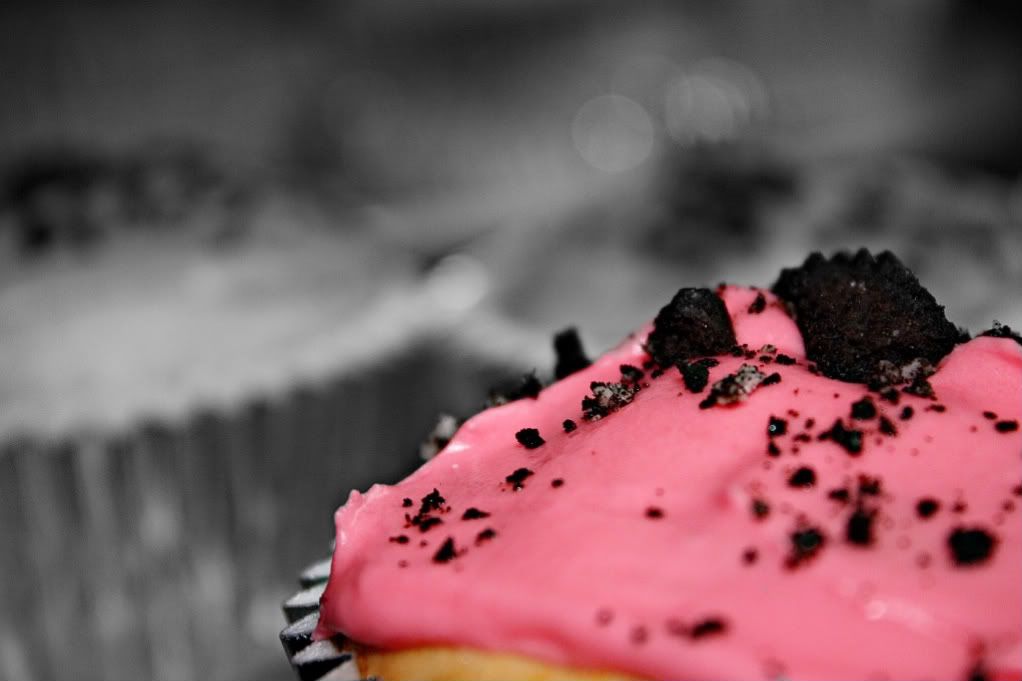
I know these probably don't look all that appetizing, but I smashed up the Halloween edition Oreos since they'll be part of the "topping" for the cake in addition to being part of the filling that's already baked into it. 


Here's the finished product! 


Now....this was just a test run for me to make sure this pan actually worked. I really don't eat cake very often and when I do have it, it's a TINY piece. You can ask anyone who has grown up with me; whenever it was my birthday, I had birthday PIE, not birthday CAKE. To be specific, Lemon Meringue. So, when the cake was all finished..the main question that came to mind was "Well. Now what?". I didn't want any of it nor did Stefanie since we're both TRYING to behave when it comes to eating well...and cake certainly didn't help with the whole scenario of working our way into smaller jeans. After much debate...we had an answer..

Death to the cake. 


Yes... blasphemy! The cake..the perfectly delicious cake got cut up and trashed since we couldn't think of anyone that'd benefit from it. It was baked on a Friday night and we weren't wanting to hold onto it throughout the weekend for her to bring into work on Tuesday..just wasn't worth it in the long run. At least this gives you an idea of how it looks once it's all cut up. 


There ya have it! The massive cupcake cake actually works! Yippy!! 


Photobucket

Tuesday, October 26, 2010

Free Time = Pointless Baking

Now that I have a lot of time on my hands, I try to waste some of the day by baking. Luckily, my son has the week off from school, so he'll gladly help me dispose of all this sinfully sweet stuff (it's be rather porky of me to eat it all). I'm sure Eric would be willing to help, but I have a feeling he's going to be PT testing again pretty soon ....so, not too many fatty goodness things for him! 


 A while back, I posted a recipe for "Oreo Cake"...here's the link to that post (scroll to the very bottom). Anyway, I figured I'd try making it in cupcake form today...same exact ingredients, only 20 minutes of baking time.. and tah dah! Came out amazing! With the frosting, I added extra powdered sugar so it'd make it a little thicker, rather than having it drip all over the place. All in all, it came out really well (John gave it two freckles up). 

Andddddddddddd here's my artistic pictures: 


Saturday, August 28, 2010

My Apologies.

Per request from STEFANIE and several other people, this blog is for you :) 

I was bored earlier this afternoon and randomly decided "Hey, I wanna make cupcakes". Truth be told, I like to experiment when I make stuff..sometimes it works in my favor, sometimes it doesn't. Eric rolls his eyes when he see's me adding food coloring to stuff... I like to play with my food, per say. Makes it a lil more fun when I make pink pancakes, tie dye cupcakes, blue rice krispies... random, but different. 

I'm really not a fan of chocolate. Given, I live in Belgium where I'm surrounded by AMAZING chocolate, but I just don't really indulge in it considering I'm more of a fruit type of person. Hell, I never have a cake for my birthday.. I always have pie (Lemon Meringue or Razzleberry). True story. 

By the way, I'll shamelessly plug Pampered Chef since I used my PC goodies to make this recipe.  *Grin*

So, I happened to have an extra box of cake mix left over from when I made the Black Forrest Trifle for a party I went to not too long ago. 


I followed the directions that were on the box, but instead of using vegetable oil (I didn't have any), I just used 1/2 a cup of Challenge butter (unsalted).  I melted the butter in my Micro-Cooker since it needed to be softened before I could blend all the ingredients together.I used my Stainless Steel Mixing Bowls (one for the batter, another for the icing) and used a lil electric mixer since I figured if I blended the batter like crazy, it should put a good amount of air in the cakes so they'd be fluffy (I was right!). 


 Using some Reynolds cupcake foils, I baked the cupcakes in my Muffin Pan for about 25 minutes at 325* (I used my Weight Watchers ladle to put the right amount of batter in the cups). 


While the oven was working it's magic, I started to figure out what I wanted to do as far as icing. I had a container of Betty Crockers Cream Cheese Frosting, but in all honesty, it was way too sweet for me. It was bound to give me a headache because of how distinct the sugar taste was. So, I started experimenting! 

Cue in: Almond Extract!


I emptied out the container of frosting into my 2qt stainless mixing bowl with my Small Mix N Scraper (it's a life saver and gets every molecule of whatever it is you're scraping) then proceeded to use my mini hand blender. Truth be told, the spout on the bottle of Almond Extract is a lil on the large side so when I was adding the extract, a lot came out. My ballpark guess is that I used about 1.5 tablespoons worth (it'll smell REALLY almondy!) Then I mixed in 3/4 of a stick of Challenge butter (softened). Yes, it sounds super fatty, but the butter really toned down all the sugar! To tone down some of the Almond, I actually put in a hefty spoonful of milk chocolate frosting (another flavor from Betty Crocker ). It gave the icing some color (a very light tan color) and it put a lil chocolate twist to it. Mixed it even more and set it in the fridge till I was done baking all the cupcakes and they were cooled. 

When the cakes were done, I had 'em hang out my Stackable Cooling Rack for about an hour to ensure they were completely cooled off since I didn't want the icing to melt off. Once they were ready, I pulled out my Easy Accent Decorator and started filling it up with the icing mixture (used the star accent tip) and started going to town on the cakes. Poor lil things didn't have a chance since I smothered them in the icy goodness. After all was said and done, my little army was almost complete. The final thing that needed to be done?

SPRINKLES.

 
I absolutely LOVE Pampered Chefs Sweet Caramel Sprinkles...I use it pretty often if I'm wanting to make a sweet snack (toast, a slather of cream cheese and this sprinkled on top). That, or I use their Sweet Apple Sprinkles (they're amazing!!)

Anyway, here's the finished result:


They came out VERY light and fluffy, even with the icing! Calorie-wise, it's not light. In fact, It's extremely fattening, but ya know what... we all deserve a splurge from time to time :) 

ENJOY!